
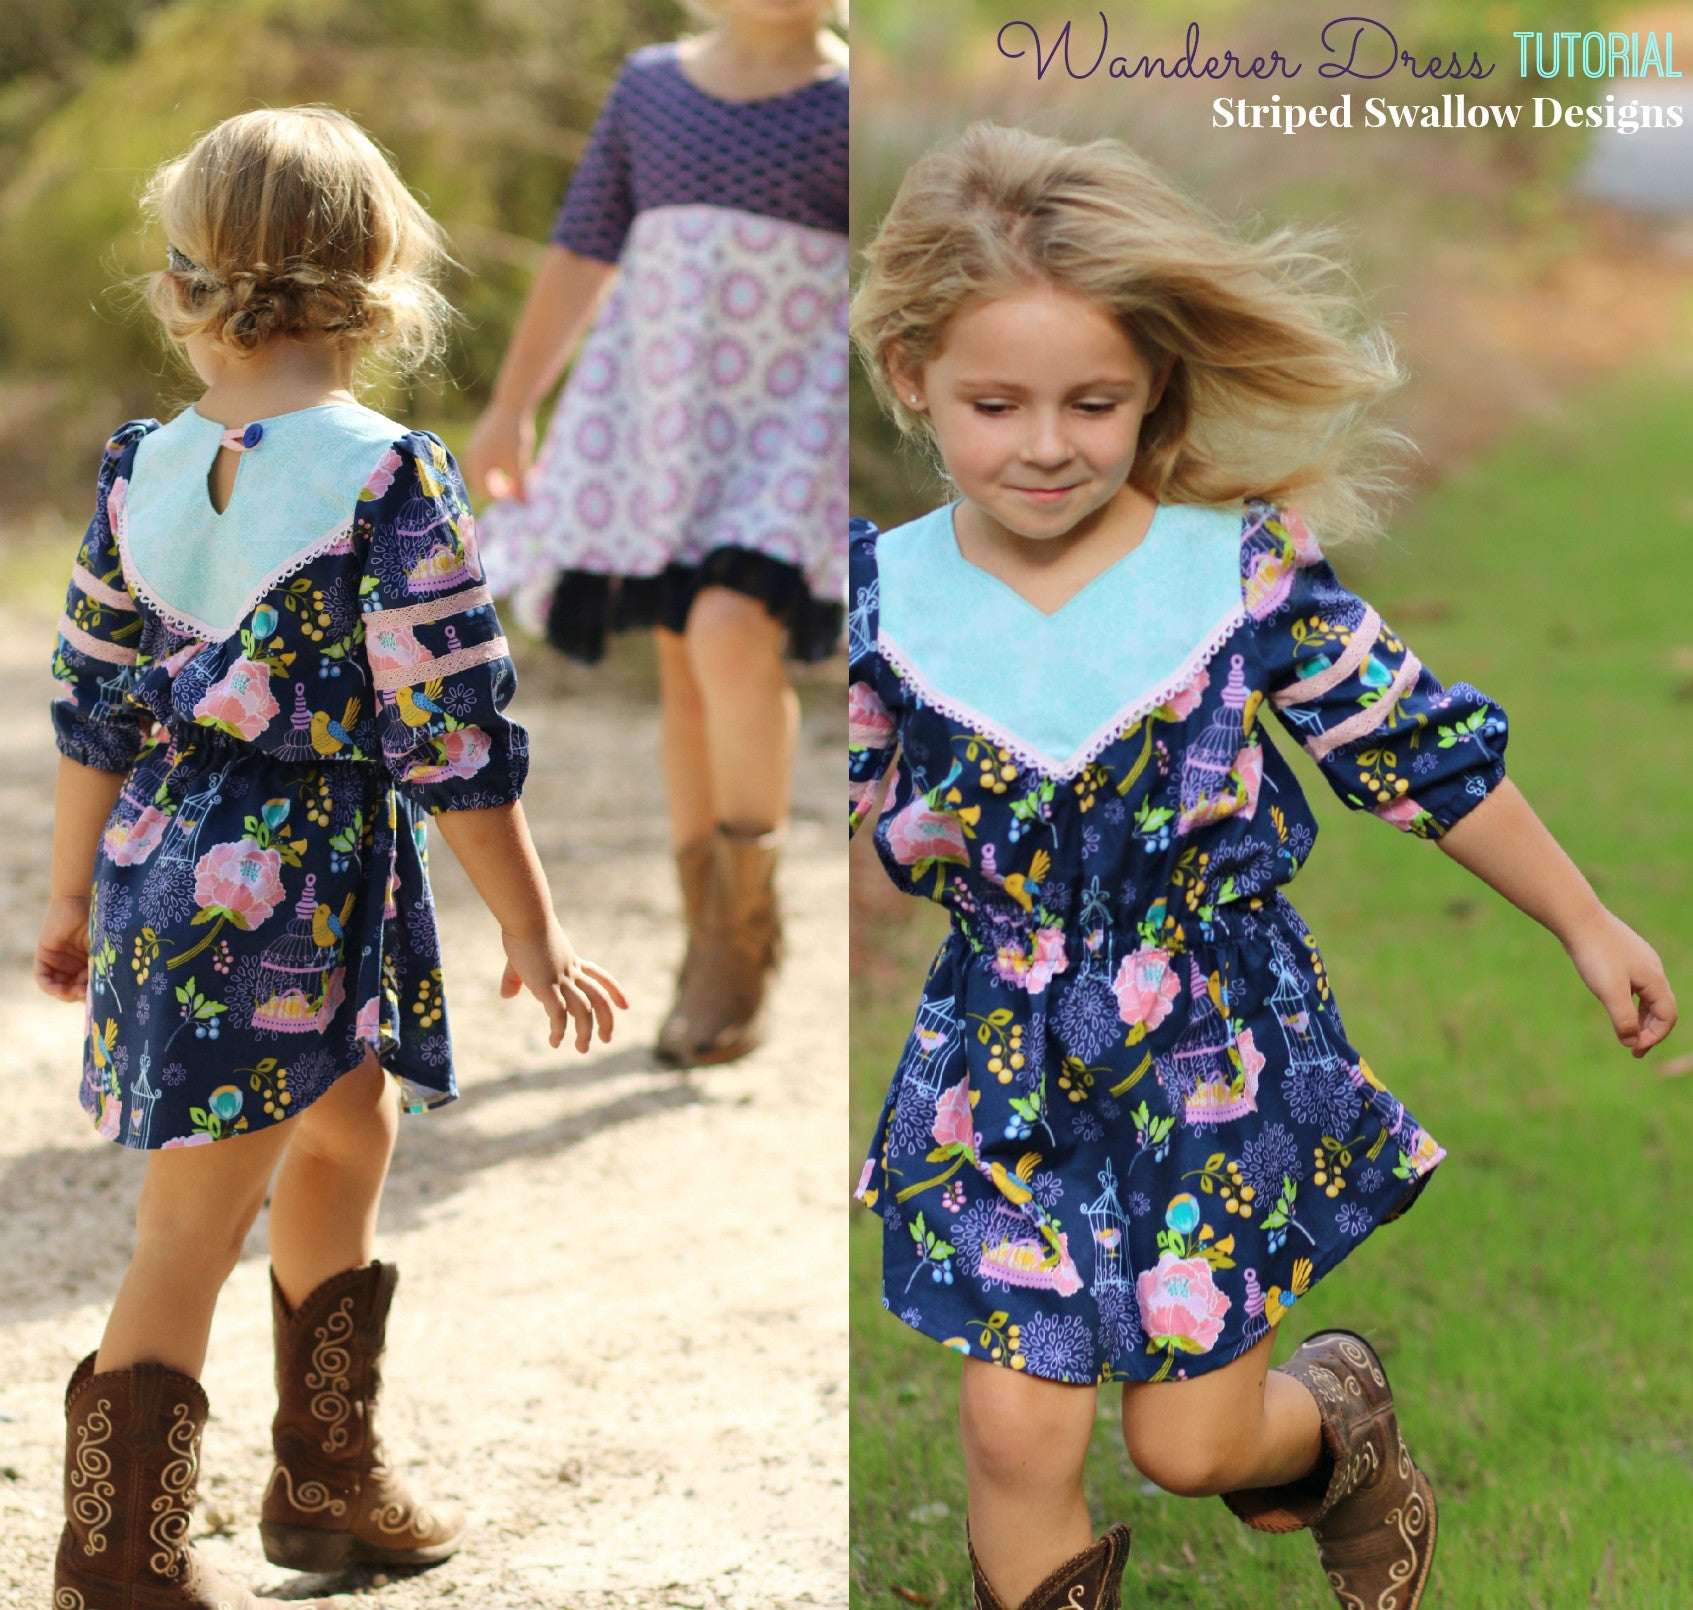

I knew immediately when I was asked to join in on the Lulabelle Blog Tour that I wanted to make a Wanderer Dress to showcase this gorgeous new fabric line by Dodi Lee Poulsen for Riley Blake Designs! I've wanted to write up this tutorial for quite some time and SO happy this project got me going on it :) If you would like to join in on the Sew Along next week, head on over to the Striped Swallow Designs Sewing Group and request to join. During the Sew Along (SAL) I will show you how to lengthen the dress and add an elastic casing. Or if you prefer not to join the FB group, you can always follow along on this post as the tutorial will be posted here and updated daily throughout the SAL.
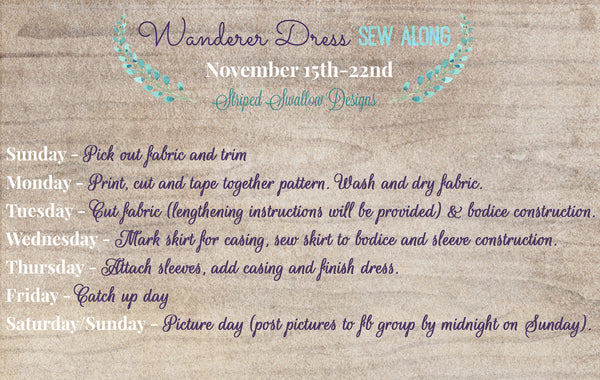
If you don't have a copy of the Wanderer Tunic pattern just yet, use coupon code LULABELLE for 25% off, now through the end of the Sew Along (November 22nd at 11:59PM CST).

Today we will start out with picking fabric and any trims you would like to use for the armbands and/or yoke. There are quite a few sleeve options for this pattern so go ahead and take a look at pages 5-7 and decide which option you would like to create.
Once you have your fabrics picked out, head over to the Striped Swallow Designs Sewing Group and post a pic to the album! (If your not a member of the group yet, just request to join and I'll get you approved shortly.)
Supplies: In addition to the supplies listed in the pattern, you will need 1/2" elastic. For the casing, you can either choose to use 7/8" or 1" wide ribbon or you can make single fold tape (I'll go over both options during the SAL). You will also need a little extra fabric than given in the tutorial since fabric requirements listed there are for tunic length.
I'm going to go ahead and post day 2 for those of you that may be busy tomorrow :) ...
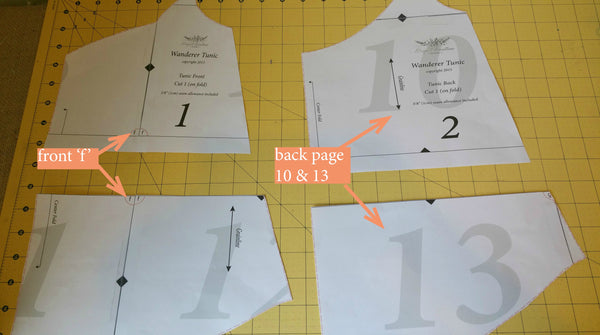
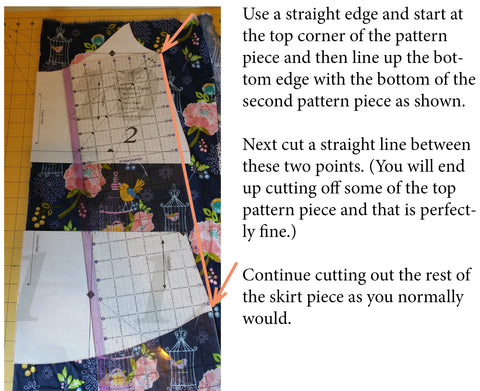
Print out the pattern, don't forget to print landscape and to take advantage of the layered pattern pieces (instructions on page 4 of pattern). Once you have everything printed out, you will assemble all your pattern pieces as you normally would except for the tunic/skirt pieces. Assemble the tunic/skirt pieces as shown below, do not tape the top and bottom portions together (this is where we will lengthen the skirt). Also, since we are not putting together the bottom and top of the tunic/skirt pattern pieces, you may want to mark each piece with either 'front' or 'back'. (I made the mistake of cutting out my skirt piece with one piece from the front and the back...you don't want to do that!)
Make sure to wash and dry your fabric today also!
Today we will be cutting out our fabric and constructing the bodice. You will cut out all of your pieces as per the pattern, except for the tunic/skirt pieces. In the next step, make sure you are using a coordinating top and bottom tunic pattern piece as shown on Day 2 (photo just above).


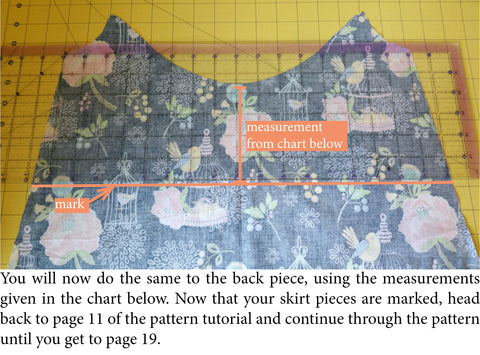
**If making the women's version or if you would prefer a different length. Measure from the top of the inner thigh down to where you would like the bottom of the dress hem to hit. If you plan on adding the casing or shirring your waist, you will want to add 2" to the measurement you just came up with since the dress will rise up a bit. This is the measurement you will use to lengthen your tunic pattern pieces.
Complete bodice construction, starting on page 8 and ending after the first step on page 11.
Next I will show you how to mark the skirt for adding the elastic casing tomorrow. For my Lulabelle Wanderer Dress I wanted the casing on the inside of the dress, but you could also add a contrasting casing on the outside of the dress. If you want the casing on the outside, make sure to put your markings on the right side of the fabric. Also if you would prefer, you can use pins to mark the casing placement.


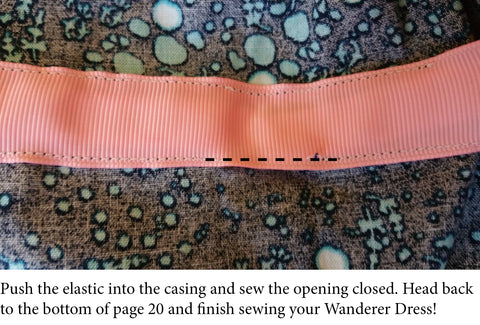
Today you will start at page 19 and sew your sleeves on your bodice as instructed. Sew the first side seam, iron your hem under and then stop just prior to sewing the second side seam as shown on the bottom of page 20.

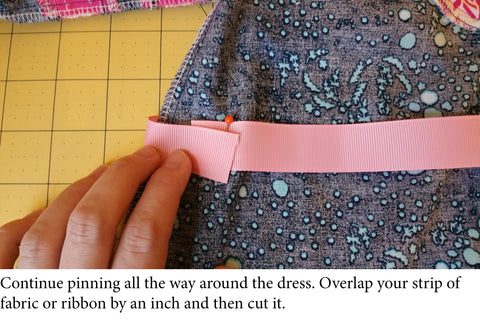
There are a couple options for the casing, you can add it to the wrong side of the fabric so that it is hidden or add a contrasting casing to the right side of the fabric (as shown on the dress pictured on the right above).
You can use either ribbon (7/8" or 1" width) or make a single fold tape. If making the single fold tape, go ahead and cut a strip of fabric that is 1.75" by selvage width.
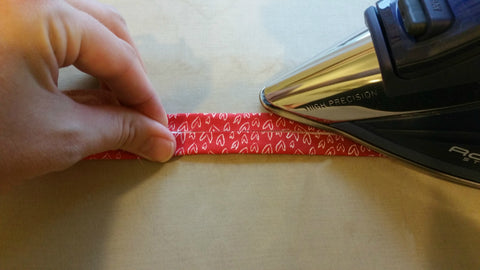
Iron the top and bottom of the strip you just cut so that the raw edges meet in the middle.
I will now show you two ways to complete the casing. The first is my preferred method, just because it's quicker (keep in mind with this method you will have a small amount of elastic in the side seam). Go ahead and read through both casing options and decide which you would prefer. Then it's time to finish sewing your Wanderer Dress!!
In this example, I'm showing the casing being added on the inside of the fabric. You'll want to add it to the right side of your fabric though if you chose to go with the contrasting casing.

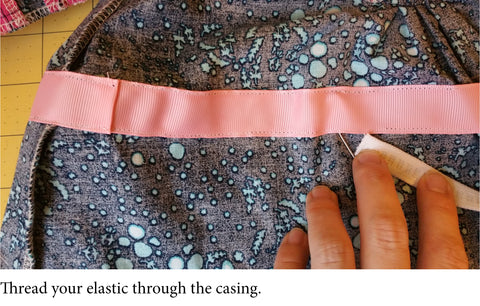
Cutting your elastic - I have included measurements to cut your elastic based off of ASTM standards, but if you would like to get the best fit and you can measure the recipient’s waist, then take their waist measurement and subtract 1”.


For this option you will want to go ahead and sew the other sleeve and side seam as shown on the bottom of page 20.


Cutting your elastic - I have included measurements to cut your elastic based off of ASTM standards, but if you would like to get the best fit and you can measure the recipient’s waist, then take their waist measurement and subtract 1”.

Tomorrow is catch up day for those of you that are not able to complete your dress today. :)
Take photos of your little in their new Wanderer Dress and post to the SAL album in the FB group. Everyone that post photos to the group by midnight on Sunday (November 22nd) will receive 50 SSD Rewards Points!

I hope you love your Wanderer Dress!! I'll have a tutorial up soon on how to add the underskirt to the Boheme Sky pattern as shown in the photo above.
xoxo,
Mandalynn
Comments will be approved before showing up.

Tiny Seamstress
November 12, 2015
SO darling!